목차
- Standard List Controller 사용하기
- Static Resource 사용하기
Standard List Controller 사용하기
Standard List Controller
: 레코드 set을 표시하거나 작업할 수 있는 Visualforce page 만들 수 O
Standard List Controller를 통해 특정 개체 레코드 쿼리, collection 변수에서 레코드 사용, 결과 필터링, 페이지 지정 등의 작업
- Standard (Record) Controller : 단일 레코드 로드
- Standard List Controller : 레코드 목록/컬렉션 로드
Record List 출력
<apex:pageBlockTable>과 같은 Standard List Controller, iteration component 사용하여 레코드 목록 출력하기
<apex:page standardController="Contact" recordSetVar="contacts">
    <apex:pageBlock title="Contacts List">
        <!-- Contacts List -->
        <apex:pageBlockTable value="{! contacts }" var="ct">
            <apex:column value="{! ct.FirstName }"/>
            <apex:column value="{! ct.LastName }"/>
            <apex:column value="{! ct.Email }"/>
            <apex:column value="{! ct.Account.Name }"/>
        </apex:pageBlockTable>
    </apex:pageBlock>
</apex:page>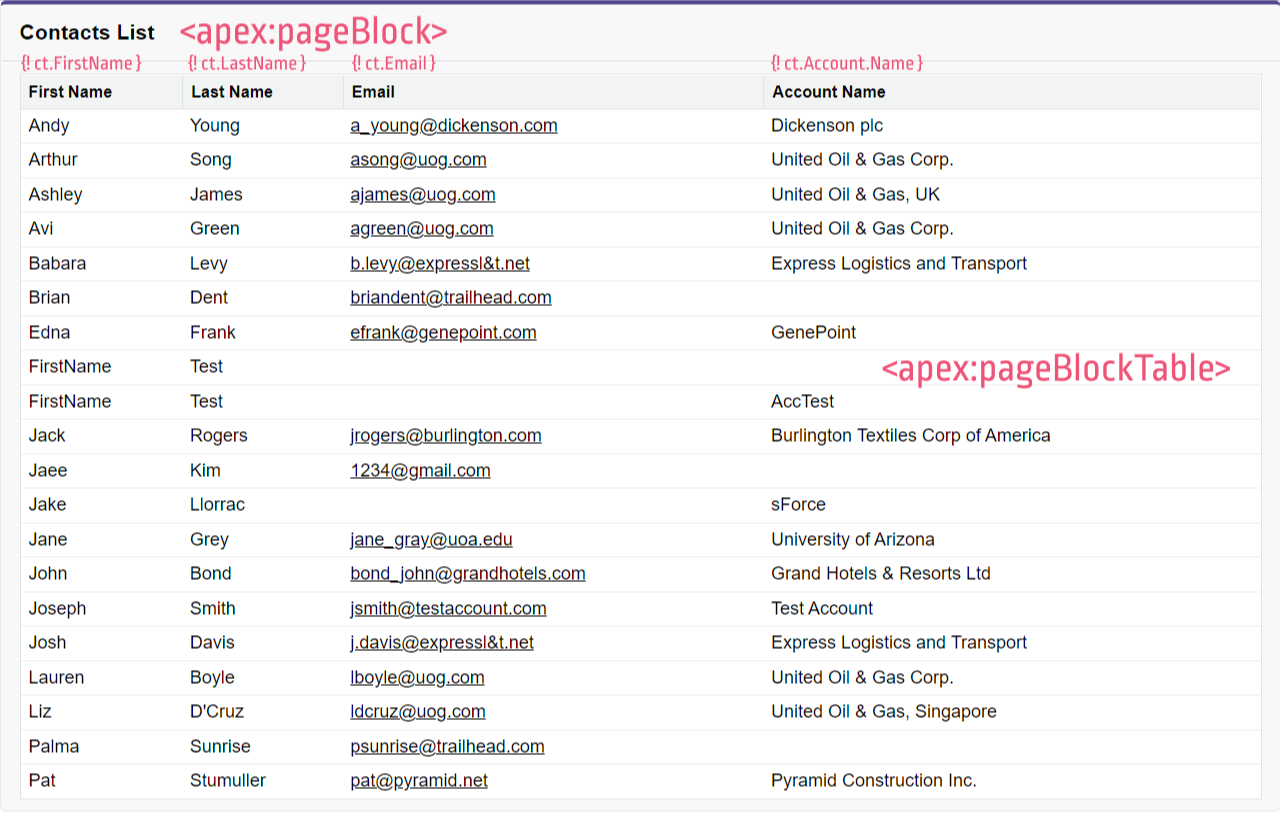
List View 필터링 추가
1. 새 필터를 선택하면 레코드 목록이 변경됨
2. 전체 페이지를 새로고침 하지 않고 목록이 업데이트 (Ajax)
//<apex:pageBlock> 안에 입력
Filter:
<apex:selectList value="{! filterId }" size="1">
    <apex:selectOptions value="{! listViewOptions }"/>
    //reRender = Ajax 효과 ("contacts_list"만 업데이트)
    <apex:actionSupport event="onchange" reRender="contacts_list"/>
</apex:selectList>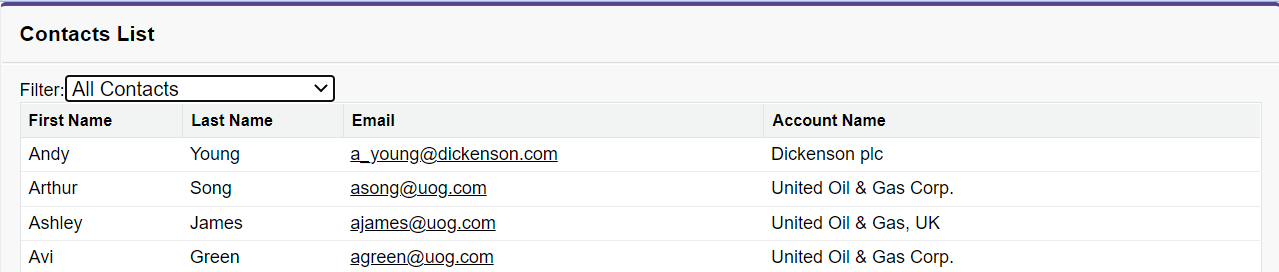
이 페이지의 Cycle :
1) 페이지가 로드되면 <apex:selectList>는 {! listViewOptions }*에서 목록을 가져와 사용 가능한 필터 메뉴 만듦
*{! listViewOptions } : Standard List Controller에서 제공하는 속성
2) 메뉴에서 새로운 옵션 선택하면 onchange 이벤트는 <apex:actionSupport> component에서 실행됨
3) onchange가 실행되면 페이지는 <apex:selectList>에서 설정된 filterId 속성에 새 항목 제출해 선택한 새 List view 다시 제출
4) 속성이 업데이트 되면 페이지는 Contact 변수에 일치하는 레코드의 새 컬렉션과 함께 서버로부터 응답 받음
5) <apex:actionSupport>가 페이지의 일부만 다시 렌더링하도록 지정할 경우 전체 페이지 로드 X, Ajax 사용하여 페이지 업데이트
Pagination 추가
<!-- Pagination -->
<table style="width: 100%">
<tr>
<td>
//현재 페이지 of 전체 페이지
Page: <apex:outputText value=" {!PageNumber} of {! CEILING(ResultSize / PageSize) }"/>
</td>
<td align="center">
<!-- Previous page -->
<!-- active -->
//HasPrevious가 true이면 << Previous가 active
<apex:commandLink action="{! Previous }" value="« Previous"
rendered="{! HasPrevious }"/>
<!-- inactive (no earlier pages) -->
<apex:outputText style="color: #ccc;" value="« Previous"
rendered="{! NOT(HasPrevious) }"/>
<!-- Next page -->
<!-- active -->
<apex:commandLink action="{! Next }" value="Next »"
rendered="{! HasNext }"/>
<!-- inactive (no more pages) -->
<apex:outputText style="color: #ccc;" value="Next »"
rendered="{! NOT(HasNext) }"/>
</td>
<td align="right">
Records per page:
<apex:selectList value="{! PageSize }" size="1">
<apex:selectOption itemValue="5" itemLabel="5"/>
<apex:selectOption itemValue="20" itemLabel="20"/>
//Record per page를 선택하면 contact_list만 업데이트
<apex:actionSupport event="onchange" reRender="contacts_list"/>
</apex:selectList>
</td>
</tr>
</table>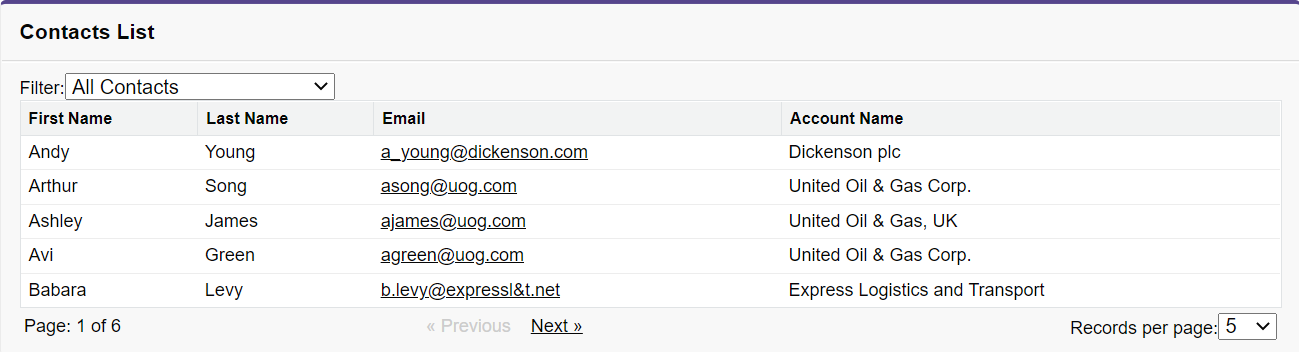
Static Resource 사용하기
Static Resource
: Visualforce page에서 참조할 수 있는 콘텐츠 업로드 O
Static Resource는 파일의 CDN(콘텐츠 전송 네트워크)* 역할을 하는 Lightning Platform에서 관리&배포
Visualforce에서 직접 사용하거나 URLFOR( )과 같은 함수에 대한 매개변수로 사용할 수 있는 $Resource 전역 변수를 사용하여 참조됨
*CDN : 지리적으로 분산된 여러 개의 서버. 웹 콘텐츠를 사용자와 가까운 곳에서 전송함으로써 전송 속도를 높임 (ATM 같은 것!)
단순 Static Resource
1. 단순 Static Resource 만들고 업로드
Setup - Static Resources - New
Name, Choose File, Cache Control 완료 후 Save
2. Visualforce Page에 Static Resource 추가
$Resource 전역 변수 사용
<apex:page>
    //Add the static resource to page's <head>
    //Static Resource Name = jQuery
    <apex:includeScript value="{! $Resource.jQuery }"/>
    //A short bit of jQuery to test it's there
    <script type="text/javascript">
        jQuery.noConflict();
        jQuery(document).ready(function() {
            jQuery("#message").html("Hello from jQuery!");
        });
    </script>
    //Where the jQuery message will appear
    <h1 id="message"></h1>
</apex:page>- JavaScript 파일 : <apex:includeScript>
- CSS stylesheet : <apex:stylesheet>
- 그래픽 파일 : <apex:image>
압축된 Static Resource
1. 압축된 Static Resource 만들고 업로드
Static Resources에 zip 파일 업로드
2. Visualforce Page에 압축된 Static Resource 추가
$Resource 전역 변수 & URLFOR( ) 함수 사용
<apex:page showHeader="false" sidebar="false" standardStylesheets="false">
    //Add static resources to page's <head>
    //Static Resource Name = jQueryMobile
    <apex:stylesheet value="{!
        URLFOR($Resource.jQueryMobile,'jquery/jquery.mobile-1.4.5.css')}"/>
    <apex:includeScript value="{! $Resource.jQueryMobile }"/>
    <apex:includeScript value="{!
        URLFOR($Resource.jQueryMobile,'jquery/jquery.mobile-1.4.5.js')}"/>
    <div style="margin-left: auto; margin-right: auto; width: 50%">
        <!-- Display images directly referenced in a static resource -->
        <h3>Images</h3>
        <p>A hidden message:
            <apex:image alt="eye" title="eye"
                url="{!URLFOR($Resource.jQueryMobile, 'jquery/images/icons-png/eye-black.png')}"/>
            <apex:image alt="heart" title="heart"
                url="{!URLFOR($Resource.jQueryMobile, 'jquery/images/icons-png/heart-black.png')}"/>
            <apex:image alt="cloud" title="cloud"
                url="{!URLFOR($Resource.jQueryMobile, 'jquery/images/icons-png/cloud-black.png')}"/>
        </p>
    //Display images referenced by CSS styles, all from a static resource.
    <h3>Background Images on Buttons</h3>
    <button class="ui-btn ui-shadow ui-corner-all
        ui-btn-icon-left ui-icon-action">action</button>
    <button class="ui-btn ui-shadow ui-corner-all
        ui-btn-icon-left ui-icon-star">star</button>
    </div>
</apex:page>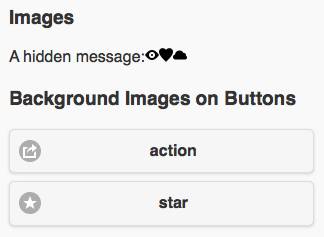
출처 : http://jaee-h.tistory.com/entry/Visualforce-%EA%B8%B0%EC%B4%88-03
'SFDC 개념' 카테고리의 다른 글
| Salesforce Apex 용어 (0) | 2023.07.07 |
|---|---|
| Visualforce - 기본4 (0) | 2023.06.26 |
| Visualforce - 기본2 (0) | 2023.06.26 |
| Visualforce - 기본1 (0) | 2023.06.26 |
| APEX - Trigger (0) | 2023.06.26 |


댓글